Embracing the wonders of your iPhone is like having a pocket-sized piece of magic in your hands – it’s that amazing! If you’ve been on this thrilling iOS journey for a while, you already know the unbeatable security it offers. But here’s a heads-up: for those security-conscious moments, discovering how to change your iPhone password is a must, especially if you’re a first-time iOS explorer. Let’s dive into the quick and easy steps to keep your iPhone fortress secure!
Change your passcode in an iPhone
Securing your iPhone with a passcode is a crucial step in safeguarding your personal information and ensuring your privacy. If you’re looking to change the passcode on your iPhone for added security, this step-by-step guide will walk you through the process effortlessly.
Follow this step-by-step guide to change the passcode on your iPhone:
Step 1: Unlock Your iPhone.
Begin by unlocking your iPhone. You’ll need your current passcode to access the settings necessary for changing it.
Step 2: Open Settings.
Once you’re on the home screen, locate and tap the “Settings” app. The icon resembles a gear and is typically found on one of your home screens or in a folder.
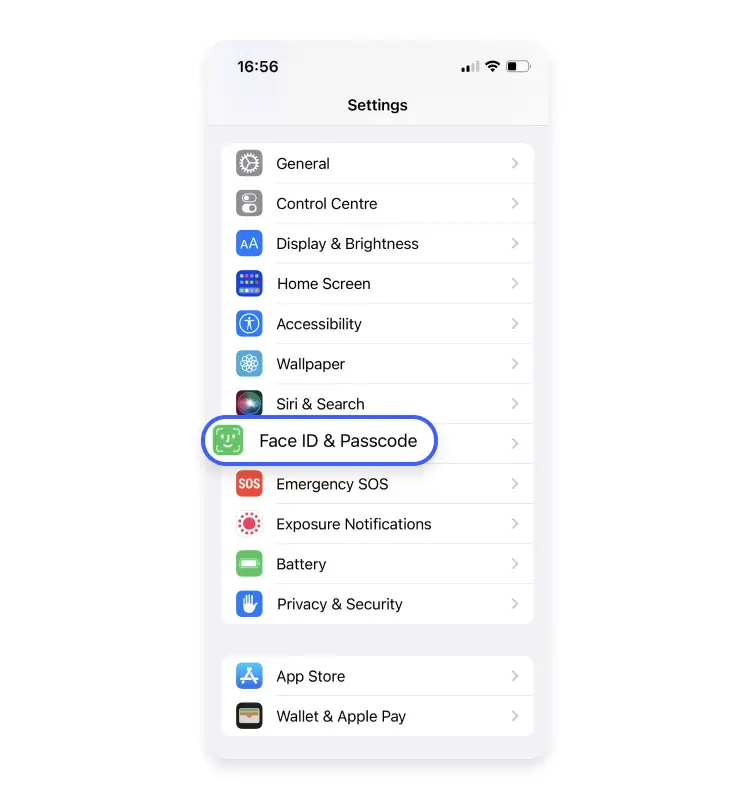
Step 3: Scroll Down and Tap on “Face ID & Passcode” or “Touch ID & Passcode”.
The exact wording depends on the model of your iPhone and the authentication method it uses. If you have an iPhone with Face ID, it will be “Face ID & Passcode.” For Touch ID, it will be “Touch ID & Passcode.”
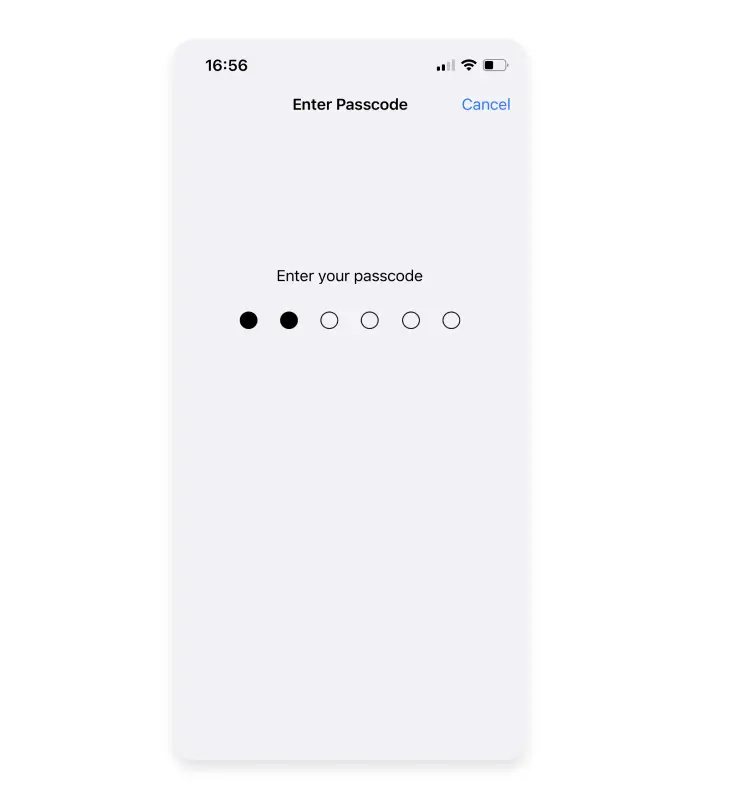
Step 4: Enter Your Current Passcode.
You’ll be prompted to enter your current passcode to proceed. This is a security measure to ensure that only authorized users can make changes.
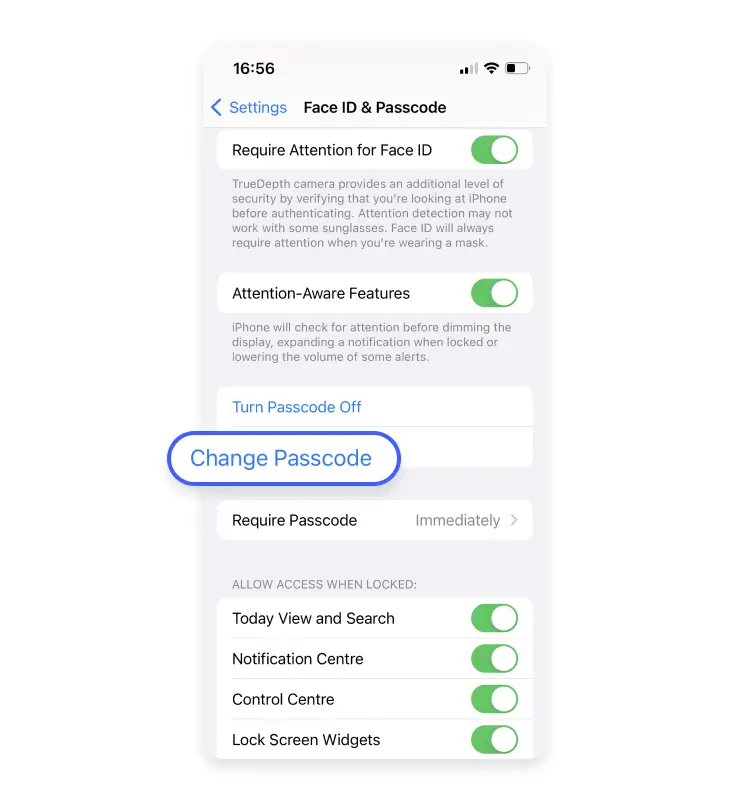
Step 5: Select “Change Passcode” .
Once you’ve entered your current passcode, look for the “Change Passcode” option on the screen. Tap on it to initiate the process.
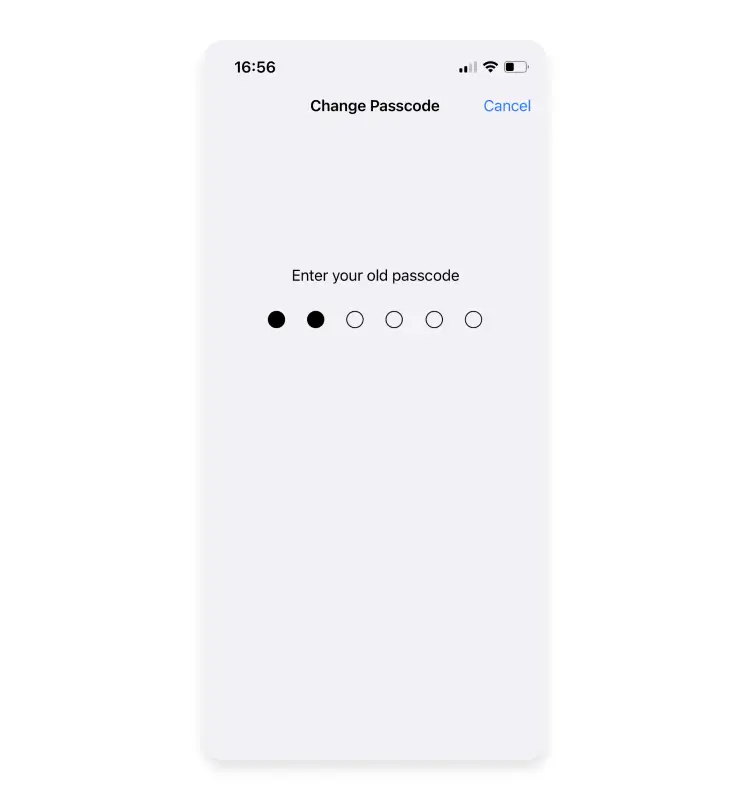
Step 6: Enter Your Current Passcode Again.
For security purposes, you’ll be asked to enter your current passcode once more.
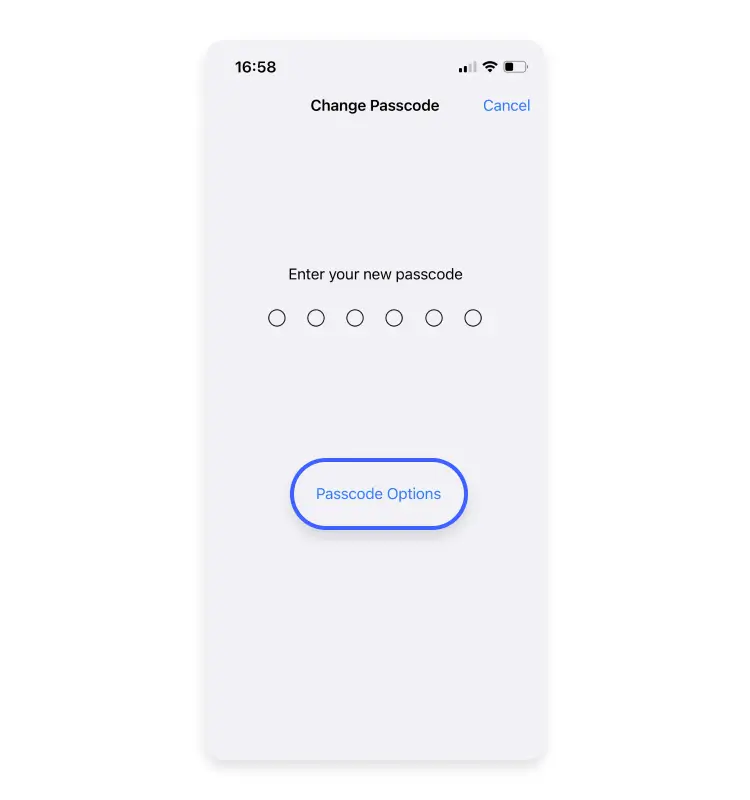
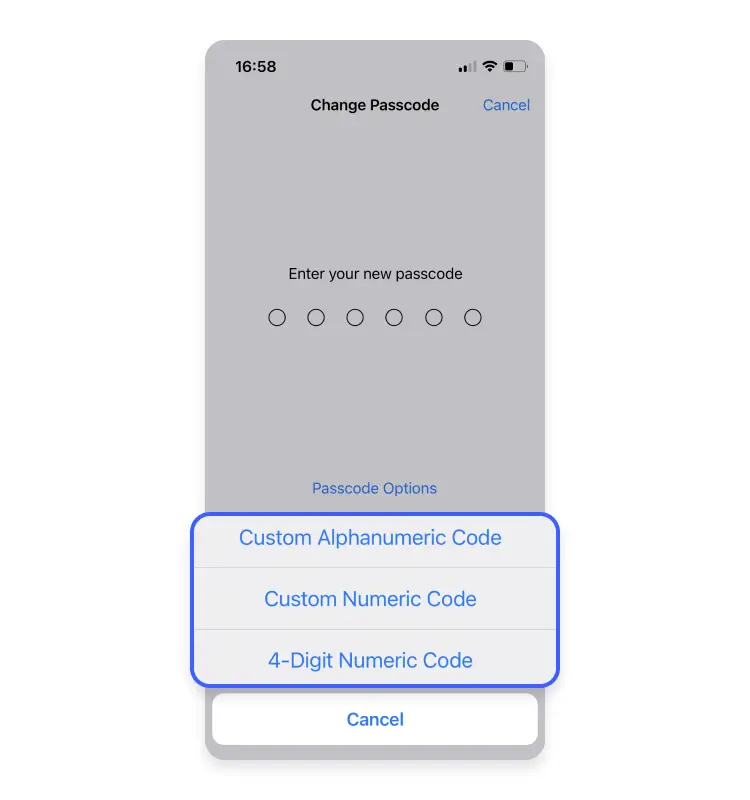
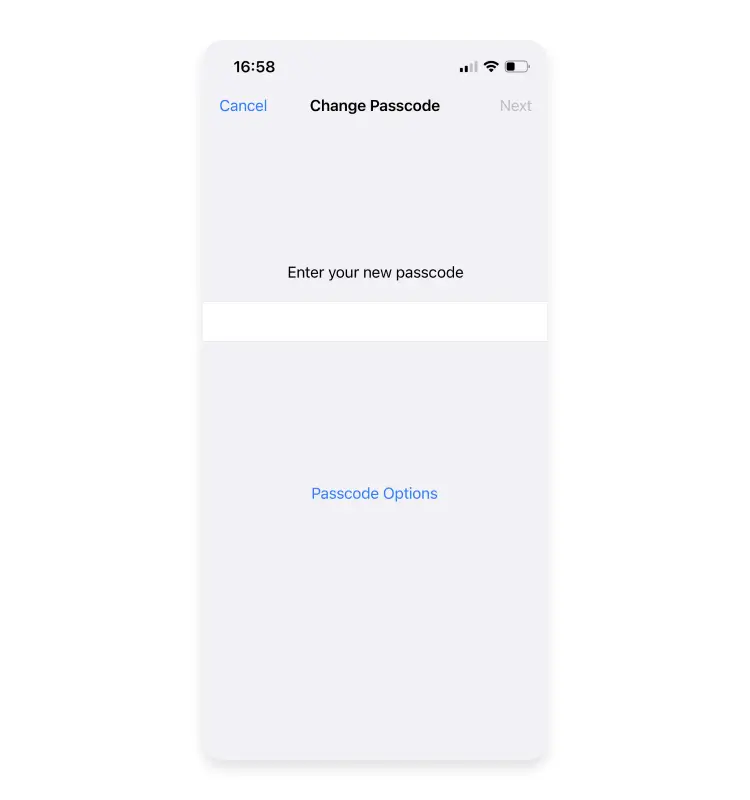
Step 7: Choose a New Passcode
Now, enter your new passcode.
Make sure it is something memorable but not easily guessable. Avoid using common combinations like “1234” or your birthdate for enhanced security.
Step 8: Confirm Your New Passcode To finalize the change, you’ll need to re-enter your new passcode. This ensures that there are no typos and that you accurately input the desired combination.
Step 9: Face ID/Touch ID Settings (if applicable).
If you have Face ID or Touch ID enabled, you may be prompted to adjust your settings. Follow the on-screen instructions to customize these features according to your preferences.
Step 10: Passcode Changed!
Congratulations, you’ve successfully changed the passcode on your iPhone! From now on, use your new passcode to unlock your device and ensure the security of your personal data.
Forgotten iPhone Passcode: A Simple Guide to Resetting It
Forgetting your iPhone passcode can be a stressful experience, but fear not – there’s a straightforward process to reset it and regain access to your device. In this easy-to-follow guide, we’ll walk you through the steps to reset your forgotten iPhone passcode.
Step 1: Stay Calm and Assess the Situation The first thing to do if you forget your iPhone passcode is to take a deep breath. Panicking won’t help, and there’s a solution to get you back into your device. Before proceeding, ensure that your iPhone has enough battery or connect it to a power source.
Step 2: Connect to iTunes or Finder Connect your iPhone to your computer using the USB cable. If you’re using a Windows PC or a Mac running macOS Catalina or later, open iTunes. For Mac users with macOS Mojave or earlier, open Finder.
Step 3: Put Your iPhone into Recovery Mode The steps to enter Recovery Mode vary depending on your iPhone model. Here’s a general guide:
- For iPhone 8 and later: Quickly press and release the Volume Up button, then do the same with the Volume Down button. Hold down the Side button until you see the recovery mode screen.
- For iPhone 7 and 7 Plus: Press and hold the Side (or Top) and Volume Down buttons simultaneously until you see the recovery mode screen.
- For iPhone 6s and earlier: Press and hold the Home and Top (or Side) buttons simultaneously until the recovery mode screen appears.
Step 4: Restore or Update Your iPhone Once in Recovery Mode, iTunes or Finder will prompt you with options to “Restore” or “Update.” Choose “Restore” to erase all data on your iPhone and install the latest iOS version.
Step 5: Wait for the Process to Complete The restoration process may take some time. Be patient and allow your computer to download the necessary software and install it on your iPhone. Make sure not to disconnect your iPhone during this process.
Step 6: Set Up Your iPhone Once the restore is complete, your iPhone will restart, and you’ll be guided through the initial setup screens. Choose “Set Up as New iPhone” or restore from a backup if you have one.
Step 7: Create a New Passcode During the setup, you’ll be prompted to create a new passcode for your iPhone. Choose a memorable code that you won’t forget easily, but ensure it provides the security your device needs
If All Else Fails: If the provided method doesn’t work for you, don’t despair. Your next best option is to reach out to Apple Support for personalized assistance. If you have forgotten password here you can learn how to find Apple ID password without resetting.
Remember, while resetting your iPhone’s passcode involves some steps, following this guide carefully will help you regain access to your device without losing your cool.
